How to Add Subtitles in Adobe Premiere Pro
Adding subtitles to your video is a simple way to make your content more engaging and accessible. Whether your audience is watching with the sound off or needs extra clarity, subtitles ensure your message gets across.
There are several options available in Adobe Premiere Pro that can be used to add subtitles, but let’s be honest, adding subtitles takes time.
If you’re here to learn how to do it, we’ve got you covered. And if you want a quicker option that doesn’t skimp on quality, we’ll introduce you to a tool that makes adding subtitles quick and simple.
Why Subtitles Matter Afterall?
Ever watched a video on mute while in a meeting (*wink*) or scrolling through social media? Subtitles are what keep you hooked. They allow viewers to understand the content without sound and ensure accessibility for everyone, including non-native speakers and those with hearing impairments.
Subtitles also boost your video’s reach by making it easier for search engines to find your content. Simply put, they are a must-have if you want your videos to stand out.
Adding Subtitles in Adobe Premiere Pro
Premiere Pro offers two main methods for adding subtitles: automatic captioning and manual creation. Let’s explore both.
Auto Captioning
Premiere Pro’s auto-captioning feature can save you a lot of effort by generating subtitles directly from your video’s audio. Here’s how to use it:
- 1: Open Premiere Pro and upload your video.
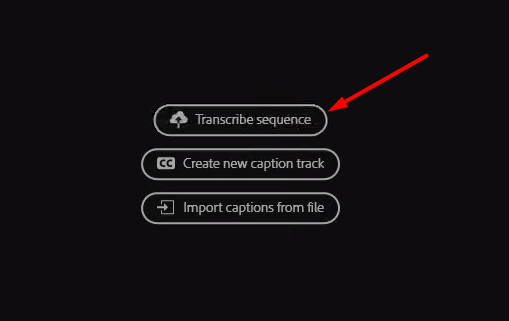
- 2: Go to the Captions menu in the toolbar.
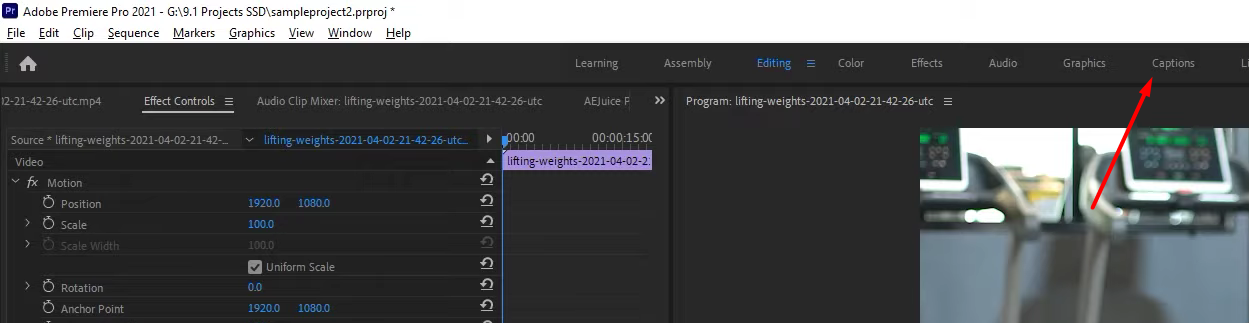
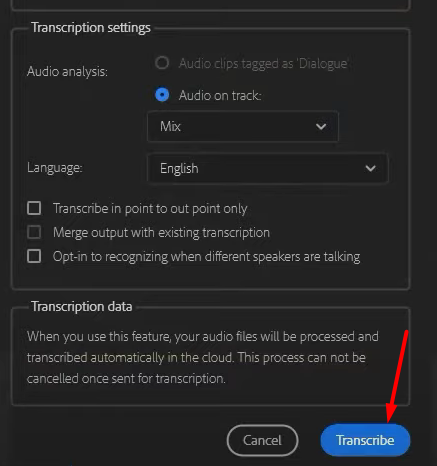
- 3: Select Transcribe Sequence. Premiere Pro will analyze your video’s audio and create a text transcription.
- 4: Once the transcription is ready, click Create Captions to add subtitles to your timeline.
- If necessary, double-click on the captions to edit the text or adjust the timing.
Older Versions of Premiere ProFor those using an older version, you might see options like CEA-608, CEA-708, and Open Captions. For the best compatibility, select CEA-708, as it works well with modern devices.
Adding Subtitles Manually
If you prefer precision or have a specific style in mind, manual creation is the way to go. It takes a bit more time, but the results are worth it.
- 1: Upload your video to Premiere Pro.
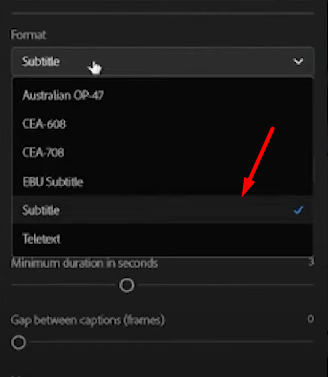
- 2: Navigate to the Captions menu and choose Create New Caption Track.
- 3: Select Subtitle as the format and click OK.
- 4: Add new captions by clicking the plus icon on the timeline.
- 5: Adjust the timing and placement of each caption to sync with the audio.
This method is ideal if you want complete control over your subtitles.
Customizing Subtitles in Premiere Pro
Once your subtitles are ready, you can make them look polished using the Essential Graphics Panel. Here are a few ways to customize them:
- Choose fonts that match your video’s tone.
- Add shadows or backgrounds to improve readability.
- Experiment with text size, color, and placement for a professional finish.
Customization allows your subtitles to enhance your content instead of just being an afterthought.
Here’s a quick & smarter option to create subtitles
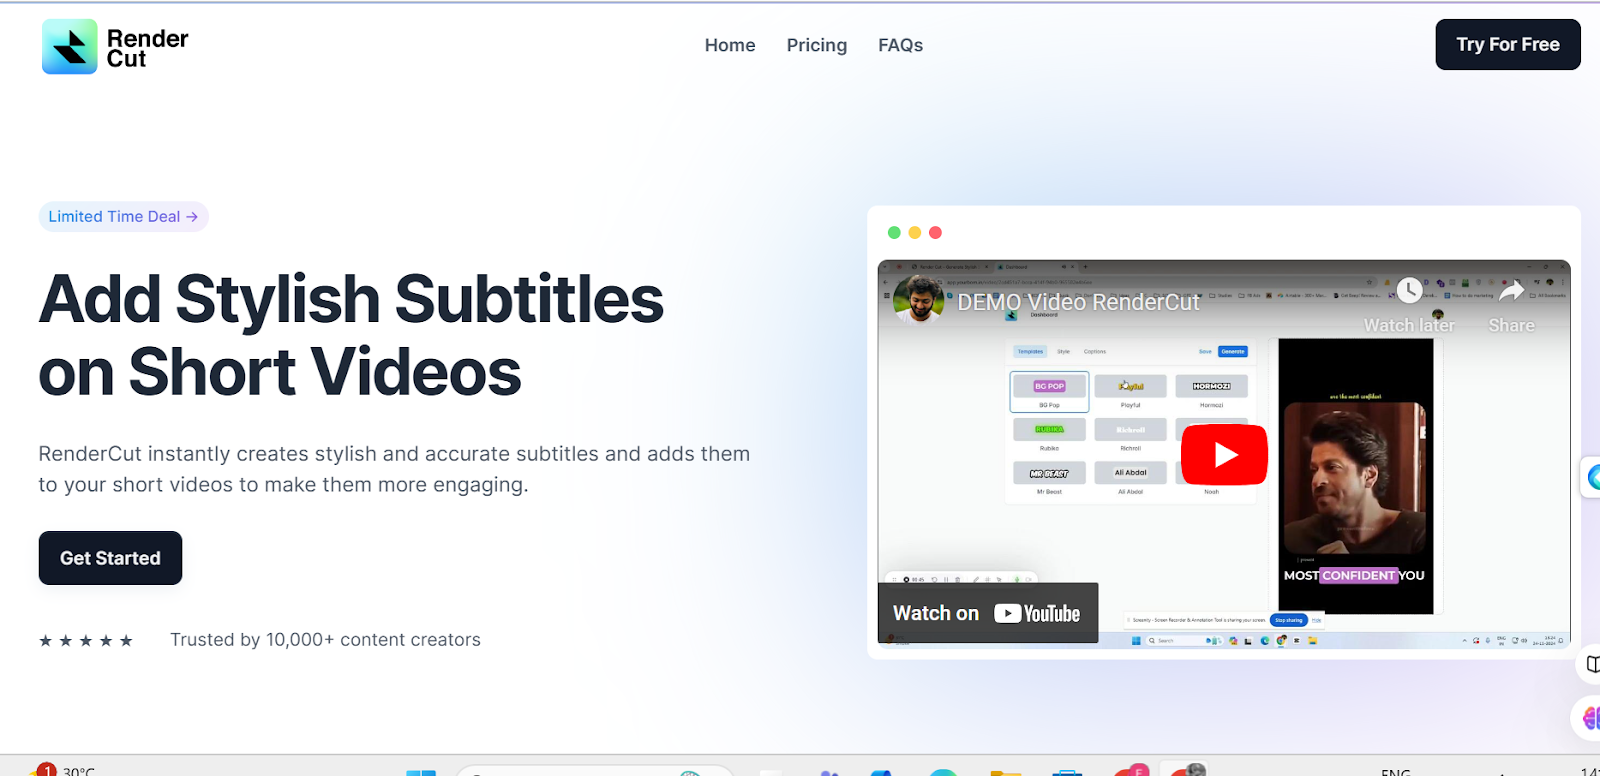
While Premiere Pro offers flexibility, it can be time-consuming, especially if you’re working on multiple videos or need subtitles in different languages. This is where Rendercut.io comes in.
Rendercut.io is an AI-powered tool designed to streamline the subtitle creation process. It automates transcription, syncing, and customisation, saving you hours of work.
How to use Rendercut.io
Rendercut.io is simple and intuitive. Here’s how it works:
- 1: Visit Rendercut.io and log in.
2: Upload your video by dragging and dropping it into the tool.
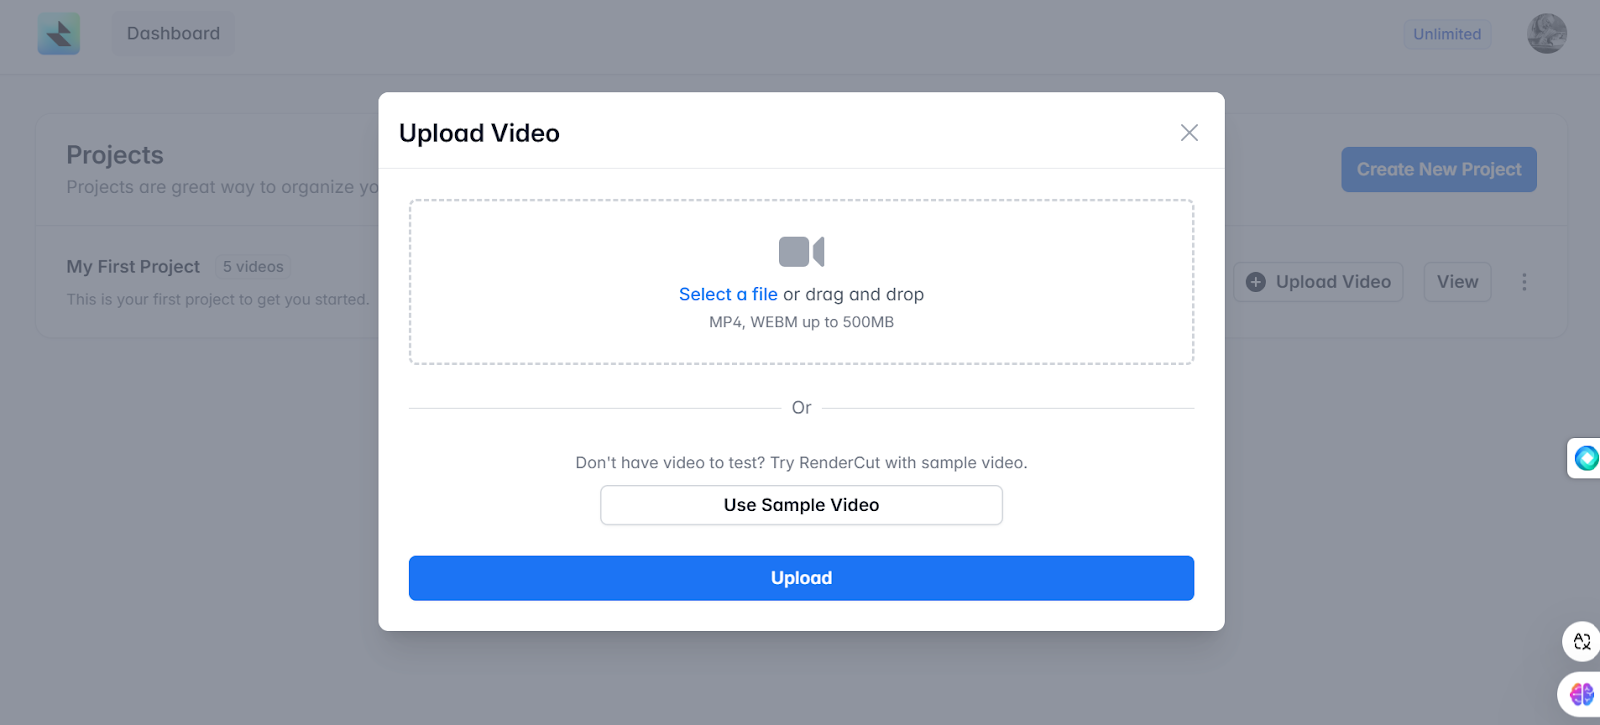
3: Select your preferred language. The tool will automatically transcribe the audio and generate accurate subtitles.
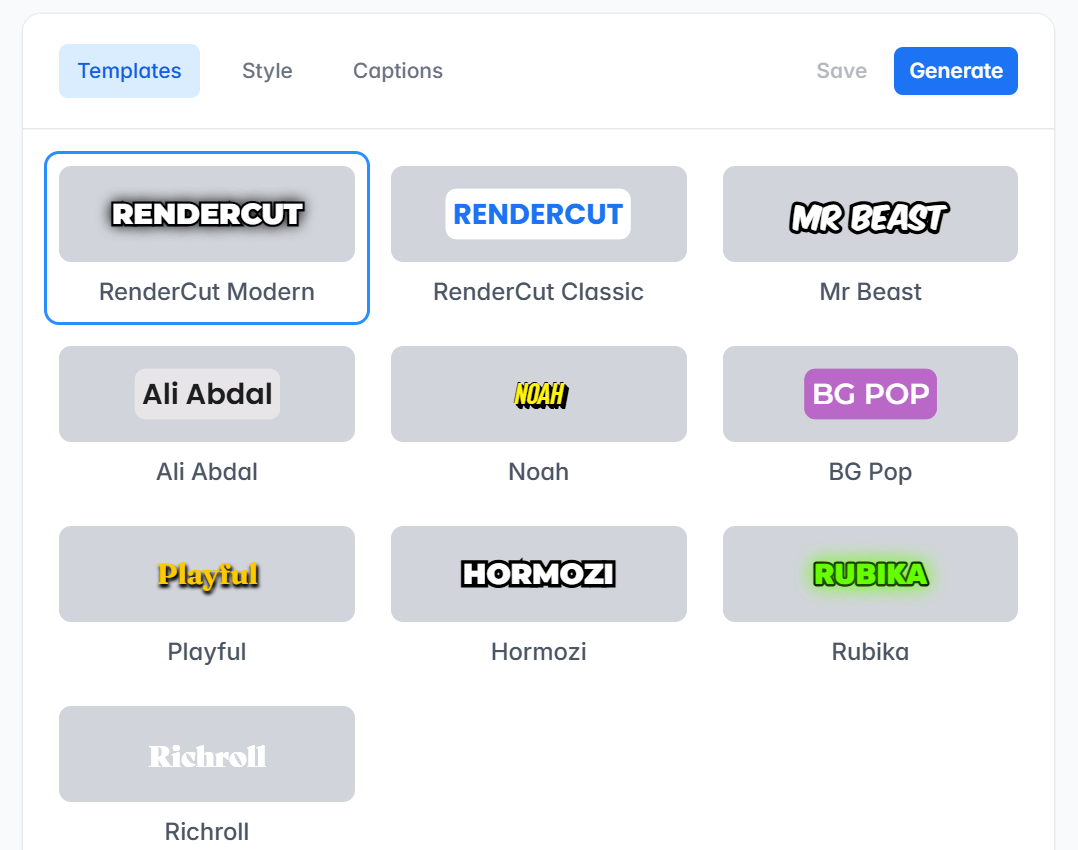
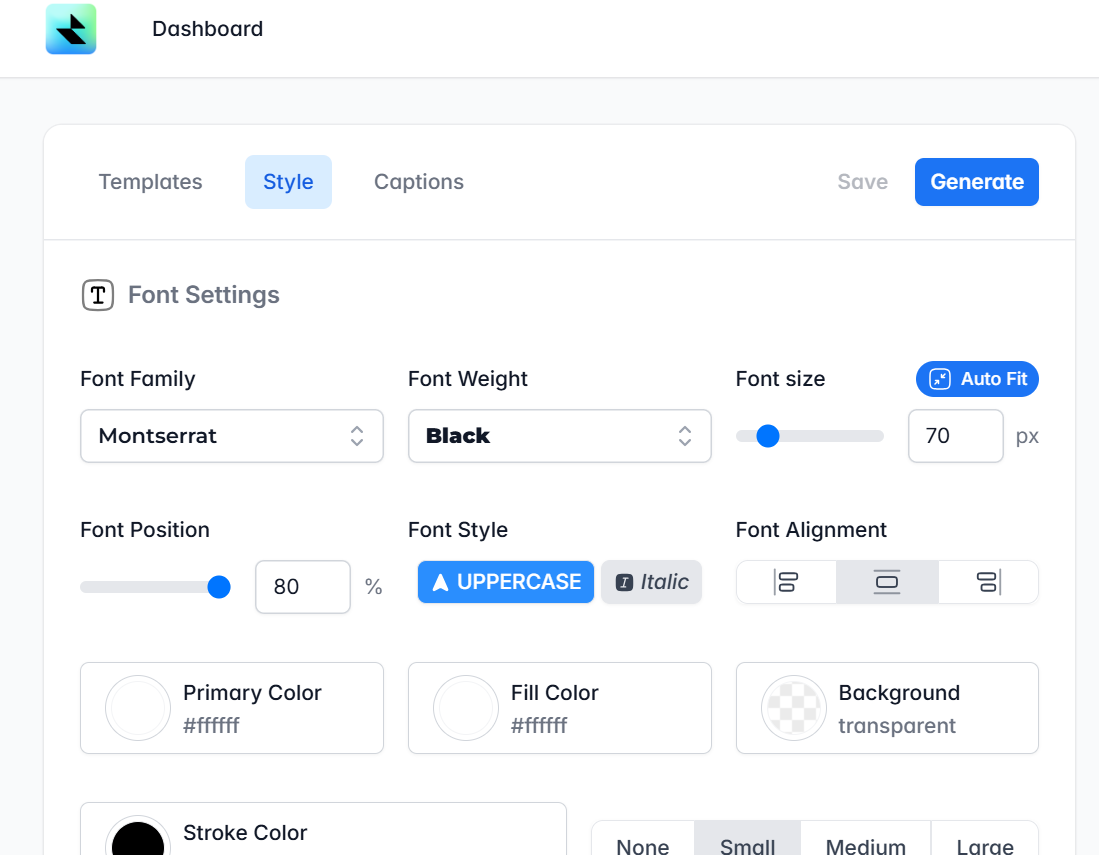
4: Use the editing tools to customize fonts, colors, and placement.
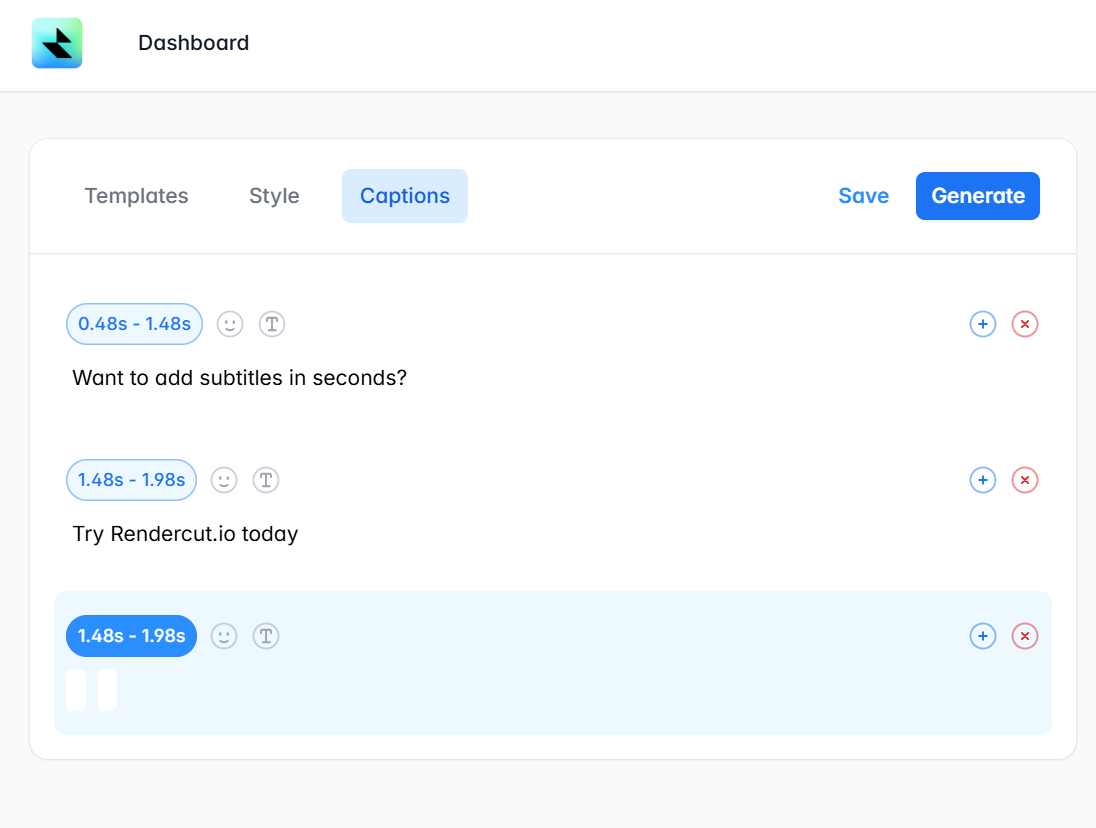
- 5: Preview your video to ensure the subtitles are perfect.
- 6: Export your video and make your content appealing!
Rendercut.io is fast, easy, and delivers high-quality results, making it a go-to for busy creators.
Why Choose Rendercut.io?
Here’s why Rendercut.io stands out
- It’s beginner-friendly and doesn’t require advanced editing skills.
- You can create subtitles in multiple languages to reach a global audience.
- Customization options let you personalize subtitles to match your brand and aesthetic peronality.
- It saves time, letting you focus on creating content instead of fiddling with settings.
Whether you’re a professional editor or a casual fun creator, Rendercut.io helps you work smarter, not harder.
Do it the simple way!
Subtitles aren’t just an add-on; they’re an essential part of video creation.
Adobe Premiere Pro gives you professional tools to create and customise subtitles, but if you’re looking for a faster and more intuitive option, Rendercut.io has you covered.
Ready to simplify your workflow? Try Rendercut.io today and create subtitles that enhance your videos in minutes.
Got questions? We are all ears! Leave a comment below, or reach out to us today.